 Pin
Pin The first time I made a protein ice cream bowl at home, I was honestly just trying to recreate that satisfying moment when the Ninja Creami spins your frozen mixture into something that feels like magic. I'd watched videos of people getting that perfect swirl, and something about turning a simple blend into restaurant-quality soft-serve completely hooked me. There's something deeply satisfying about taking Greek yogurt and protein powder—ingredients I usually throw together without much thought—and transforming them into something that tastes like dessert but actually fuels your body. My sister walked into the kitchen mid-spin and said it smelled better than any ice cream shop, and honestly, she wasn't wrong.
I made this for my roommate on a hot summer afternoon when she mentioned wanting something healthy but indulgent, and watching her face light up when she tasted it was worth every minute of the wait. She asked for the recipe immediately, which is always the real test of whether something's actually good or just sounds impressive on paper.
Ingredients
- Greek yogurt or skyr (1 cup): This is your creamy base—it's what gives the mixture body and keeps it smooth when frozen, plus the tangy undertone balances the sweetness perfectly.
- Unsweetened almond milk (1 cup): The liquid helps it blend smoothly and freeze to the right consistency; regular milk works too, but unsweetened keeps the sugar count down.
- Protein powder (2 scoops/60g): Vanilla and chocolate both work beautifully, and this is where you're getting that post-workout magic without making it taste chalky.
- Maple syrup or sweetener (1–2 tablespoons): Start with 1 tablespoon and taste before adding more—you'd be surprised how sweet the mixture already is when frozen.
- Vanilla extract (1 teaspoon): A small amount does heavy lifting, brightening the whole bowl and making it taste more like real ice cream.
- Salt (pinch): This tiny amount makes everything taste more like itself, especially if you're using unsweetened ingredients.
- Toppings (fresh berries, nut butter, dark chocolate, nuts, seeds): These aren't mandatory, but they're what turns a protein bowl into an experience—the crunch, the richness, the burst of flavor.
Tired of Takeout? 🥡
Get 10 meals you can make faster than delivery arrives. Seriously.
One email. No spam. Unsubscribe anytime.
Instructions
- Blend until silky:
- Combine the yogurt, milk, protein powder, maple syrup, vanilla, and salt in your blender and go until it's completely smooth with no powder clumps visible. This takes about 30 seconds on high if your blender is decent.
- Pour into your container:
- Use the Ninja Creami pint or any freezer-safe container, and make sure the mixture is level—this helps it freeze evenly and spin beautifully later. Pour carefully so you're not sloshing it around.
- Freeze overnight:
- Set it in your freezer for at least 8 hours, but honestly, overnight is ideal so it's completely solid and ready to transform. Mark the time so you don't forget about it sitting there.
- Spin magic:
- Remove the container from the freezer and install it in your Ninja Creami, then hit the Ice Cream button and let it do its thing for about a minute. The machine will scrape the frozen mixture into fluffy ribbons.
- Adjust texture if needed:
- If it comes out too thick, add a splash of milk and spin again for 30 seconds until it's the softness you want. If you want it creamier, re-spin without adding anything.
- Top and serve:
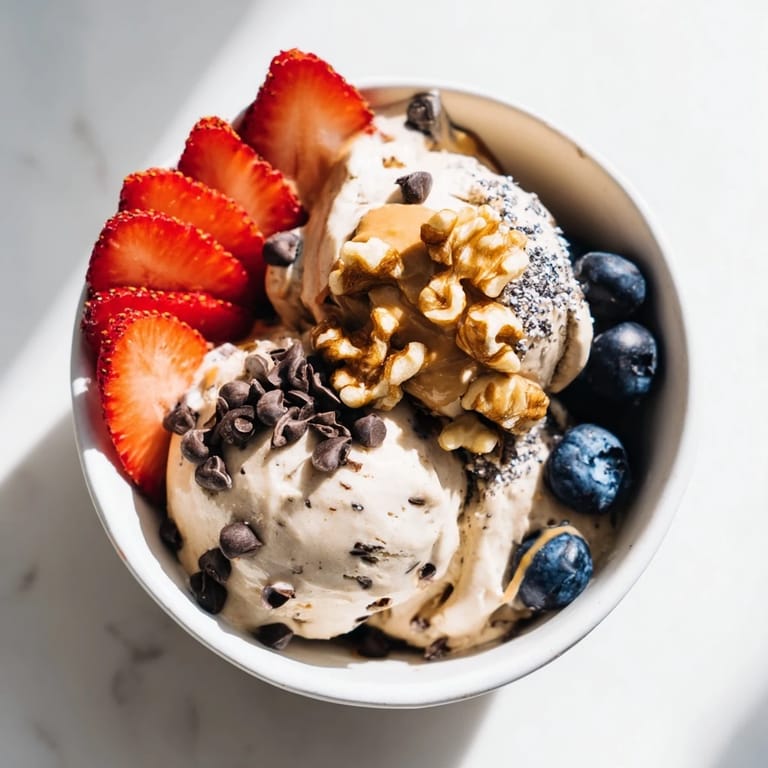
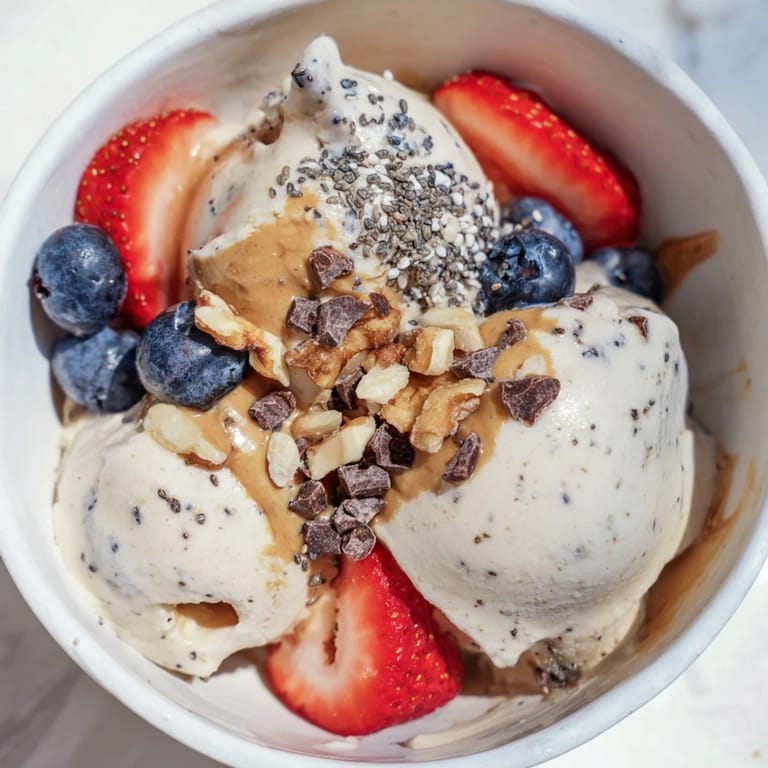
- Scoop into bowls right away and load it up with whatever you're craving—berries, nut butter, chocolate chips, nuts, seeds. Eat it immediately while it's still perfectly cold and fluffy.
 Pin
Pin There's a moment right when you hear that Creami machine stop and you open it up to find those perfect, fluffy ribbons that makes all the waiting feel worth it. It's the kind of small kitchen joy that turns an afternoon around.
Why Frozen Blends Beat Regular Ice Cream
Making ice cream the traditional way means constantly churning and monitoring temperature, which honestly feels like chemistry homework. With this method, you blend once, freeze, and let the machine do the thinking—it's almost cheat-code level of easy. The texture you get from the Creami is also different from churned ice cream in the best way; it's somehow both dense and airy, with these silky ribbons that feel luxurious without being heavy. I've had friends taste this side-by-side with store-bought protein ice cream and genuinely prefer the homemade version, which tells you something.
Flavor Variations That Actually Work
Once you nail the basic formula, you can start playing with flavors in ways that would cost you way more at a café. Chocolate versions work great if you use chocolate protein powder and add a tablespoon of cocoa powder to deepen the flavor. Coffee lovers can stir in instant espresso powder or cold brew concentrate—about a tablespoon gives you that mocha vibe without bitterness. Fruit purees blend beautifully too; I've made strawberry by blending fresh berries into the base, and it stays smooth when frozen.
Toppings and Assembly Ideas
The best part about making these at home is building exactly what you're craving in that moment. Fresh berries give you brightness and natural sweetness, while nut butters add richness and keep you full longer. Dark chocolate chips melt slightly against the cold ice cream, and seeds add this subtle crunch that makes every spoonful interesting. A drizzle of honey or a sprinkle of granola can take it from simple to something that feels special enough for breakfast or dessert.
- Layer your toppings so you get a mix in every bite instead of all the chocolate on top and plain ice cream on the bottom.
- Keep your toppings cold too by storing them in the fridge so they don't melt into the ice cream too quickly.
- Don't be shy about texture—the combination of creamy base with crunchy, fruity, and rich toppings is what makes this feel indulgent.
 Pin
Pin This recipe turned what used to feel like a guilty treat into something I actually look forward to after workouts, knowing I'm getting real nutrition and real pleasure in one bowl. It's proof that healthy eating doesn't have to mean sacrificing the joy of good food.
Recipe Q&A
- → How long should the mixture freeze?
Freeze the mixture for at least 8 hours or overnight until completely solid to ensure proper texture.
- → Can I use plant-based alternatives?
Yes, substitute dairy yogurt and milk with plant-based versions and use vegan protein powder for a vegan-friendly option.
- → What toppings work best?
Fresh berries, nut butters, dark chocolate chips, chopped nuts, and seeds like chia or hemp complement the creamy base beautifully.
- → How can I adjust sweetness?
Sweetness can be modified by altering maple syrup amount or using preferred sweeteners; omit entirely for less sugar.
- → Is special equipment required?
A blender and freezer-safe container are essential; a Ninja Creami or similar machine can enhance creaminess but is optional.