 Pin
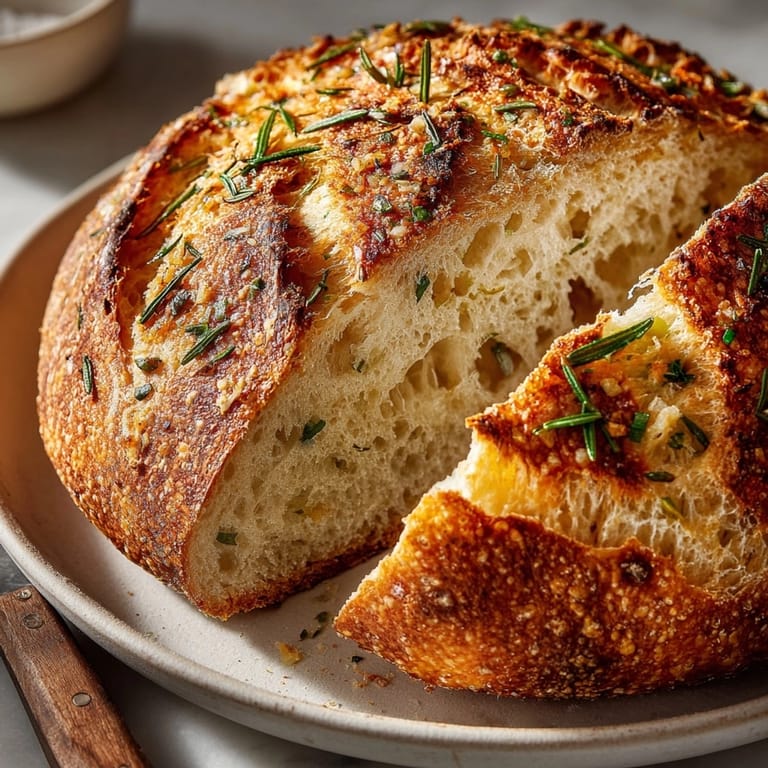
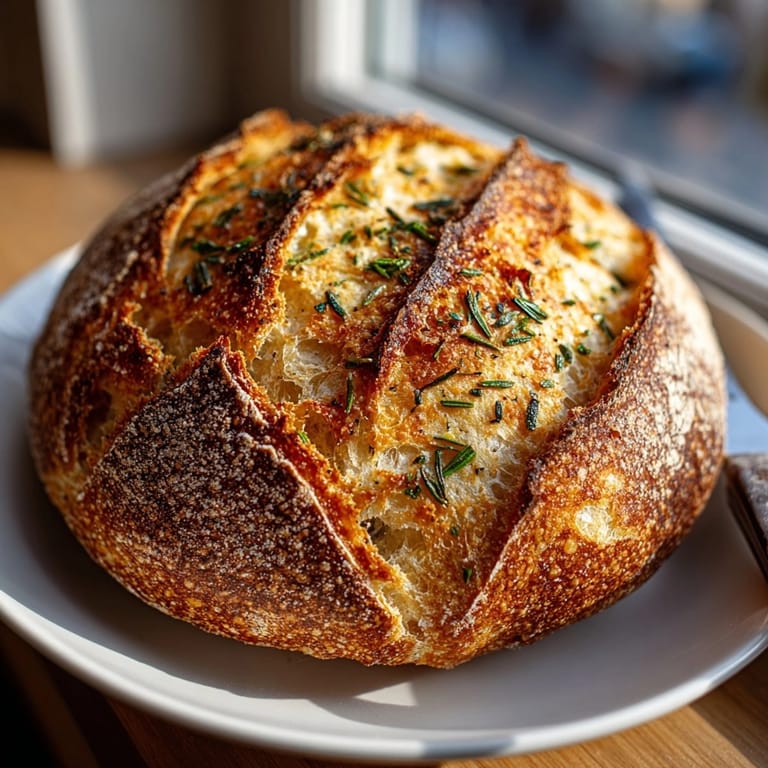
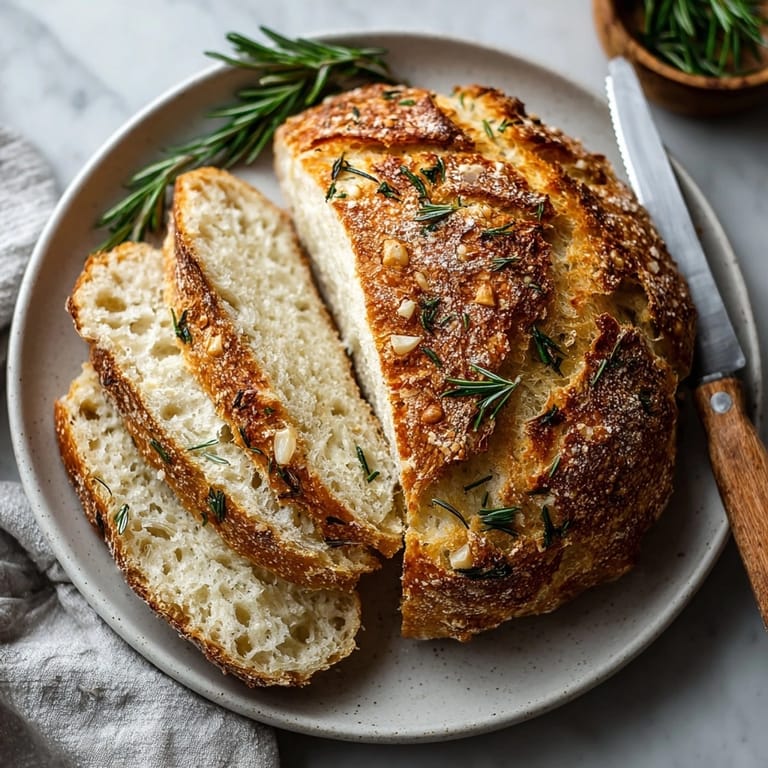
Pin This rustic rosemary garlic no-knead bread transforms basic ingredients into an artisan loaf that will fill your home with an irresistible aroma. The long fermentation creates a chewy interior with beautiful air pockets surrounded by a crackling crust—no professional bakery required.
I first made this bread during a particularly cold winter weekend when I was craving something comforting but didn't want to leave the house. The moment that golden loaf emerged from the oven, I knew this would become my signature recipe for dinner parties and family gatherings.
Ingredients
- Bread flour: provides higher protein content for better gluten development and that perfect chewy texture
- Kosher salt: enhances all the flavors while helping control fermentation
- Instant yeast: works reliably even with minimal handling look for packages labeled instant or rapid rise
- Fresh rosemary: adds aromatic pine notes that perfume the entire loaf choose bright green sprigs with strong fragrance
- Whole garlic head: when roasted transforms into sweet buttery cloves that melt into the bread
- Lukewarm water: activates the yeast without killing it aim for temperature that feels neither hot nor cold on your wrist
Tired of Takeout? 🥡
Get 10 meals you can make faster than delivery arrives. Seriously.
One email. No spam. Unsubscribe anytime.
Instructions
- Roast the Garlic:
- Slice the top quarter off a whole garlic head to expose the cloves. Drizzle with olive oil, making sure some oil seeps between the cloves. Wrap completely in foil, creating a sealed packet. Roast in a 400°F oven for 30-35 minutes until the cloves feel completely soft when pressed. Allow to cool until comfortable to handle, then gently squeeze the bottom of the head to push out the sweet, caramelized cloves. Mash with a fork until smooth and set aside.
- Mix the Dough:
- In a spacious mixing bowl, whisk together the bread flour, salt, and instant yeast to ensure even distribution. Add the finely chopped rosemary, distributing it throughout the dry ingredients. Incorporate the mashed roasted garlic, breaking up any clumps to disperse the flavor. Pour in the lukewarm water and stir with a wooden spoon or sturdy spatula until no dry flour remains and a shaggy, sticky mass forms. The dough will look rough and uneven, which is exactly what you want.
- First Rise:
- Cover the bowl tightly with plastic wrap or a damp kitchen towel to prevent the dough from drying out. Place in a draft-free spot at room temperature, ideally between 65-75°F. Allow to ferment for 12-18 hours until the dough has doubled in size and the surface is covered with tiny bubbles. The longer fermentation creates complex flavors and develops the gluten without kneading.
- Shape the Loaf:
- Generously dust a clean work surface with flour to prevent sticking. Gently scrape the dough out of the bowl with a flexible spatula, being careful not to deflate it completely. With floured hands, fold the edges toward the center a few times to create tension on the surface, then flip it over and shape into a round loaf by cupping your hands around it and rotating in small circles. Place on a large piece of parchment paper that will later help transfer the dough to the hot pot.
- Second Rise:
- Cover the shaped dough with a clean kitchen towel and let rest for 30-45 minutes. During this time, the dough will relax and slightly expand. It may not double in size, but should look slightly puffier. This shorter rise allows the gluten to relax after shaping while the yeast continues producing carbon dioxide.
- Prepare for Baking:
- Place a Dutch oven with its lid in the cold oven, then preheat to 450°F for at least 30 minutes. The preheated pot creates an initial blast of heat and traps steam, mimicking professional bread ovens. After preheating, carefully remove the blazing hot Dutch oven using thick oven mitts. Lift the dough by the edges of the parchment and gently lower it into the hot pot, parchment and all.
- Bake the Bread:
- Cover the Dutch oven with its lid and return it to the oven. The lid traps moisture released from the dough, creating steam that helps develop a crackling crust. Bake covered for 30 minutes, then remove the lid and continue baking for 12-15 minutes until the crust develops a deep golden brown color. The internal temperature should reach approximately 205-210°F if checked with an instant-read thermometer.
- Cool Completely:
- Using the parchment paper as handles, carefully lift the finished bread out of the Dutch oven and place on a wire cooling rack. Allow to cool for at least 30 minutes before slicing. During this time, the interior continues cooking from residual heat while moisture redistributes throughout the crumb. Cutting too soon results in a gummy texture and lost flavor.
 Pin
Pin The roasted garlic is truly the secret weapon in this recipe. The first time I served this bread at a family gathering, my brother in law who typically avoids carbs had three slices slathered with butter. Now whenever I visit, he specifically requests I bring "that amazing garlic bread" and watches the oven timer like a hawk waiting for it to finish baking.
Storage and Freshness
This bread is at its absolute peak on day one, with a shattering crust and tender interior. Store any leftovers at room temperature in a paper bag or wrapped in a clean kitchen towel for up to two days. Avoid plastic bags which soften the crust too much. After day two, slice and freeze remaining bread in an airtight container with parchment between slices for easy toasting. Frozen slices can go directly into the toaster for nearly fresh bread anytime.
Troubleshooting Common Issues
If your dough seems too wet and unmanageable, resist the urge to add much additional flour. This high hydration dough creates those beautiful air pockets. Instead, use wet hands or a bench scraper for handling. For a dough that seems too dry and stiff, add water one tablespoon at a time until all flour is incorporated. Room temperature can significantly affect fermentation time. In cooler kitchens below 65°F, expect the first rise to take closer to 18 hours, while warmer environments might only need 12 hours.
Flavor Variations
Experiment with different herb combinations based on what you have available. Thyme and sage create an excellent savory loaf perfect for Thanksgiving. For a Mediterranean twist, incorporate chopped olives, sun-dried tomatoes, and a teaspoon of dried oregano. Cheese lovers can fold in 3/4 cup of shredded aged cheese like Gruyère or Parmesan just before shaping. My personal favorite variation includes a tablespoon of orange zest alongside the rosemary for a subtle citrus note that complements the garlic beautifully.
Serving Suggestions
Transform this bread into an impressive appetizer by slicing, brushing with olive oil, and toasting until golden. Serve alongside a bowl of good olive oil sprinkled with flaky salt and fresh cracked pepper. For a complete meal, pair thick slices with hearty soups like minestrone or beef stew where the bread can soak up the flavorful broth. Create extraordinary sandwiches using this as your base topped with roasted vegetables, quality meats, and artisanal cheeses.
 Pin
Pin Enjoy this flavorful and aromatic bread fresh from your own oven!
Recipe Q&A
- → How do you roast garlic for the bread?
Slice the top off a whole garlic head, drizzle with olive oil, wrap in foil, and roast at 400°F (200°C) for 30–35 minutes until soft. Cool before using.
- → Can I use dried rosemary instead of fresh?
Yes, if using dried rosemary, reduce the amount to 2 teaspoons, as dried herbs are more concentrated in flavor.
- → What tools are essential for baking this loaf?
You’ll need a large bowl, Dutch oven with lid, parchment paper, sharp knife, and oven mitts for best results.
- → How can I get the crust crispier?
Bake the dough covered for 30 minutes, then uncover to finish baking, which allows the crust to become golden and crispy.
- → Is it possible to substitute the Dutch oven?
You can use any heavy, oven-safe pot with a tight lid if you don’t have a Dutch oven. This traps steam for a better crust.