 Pin
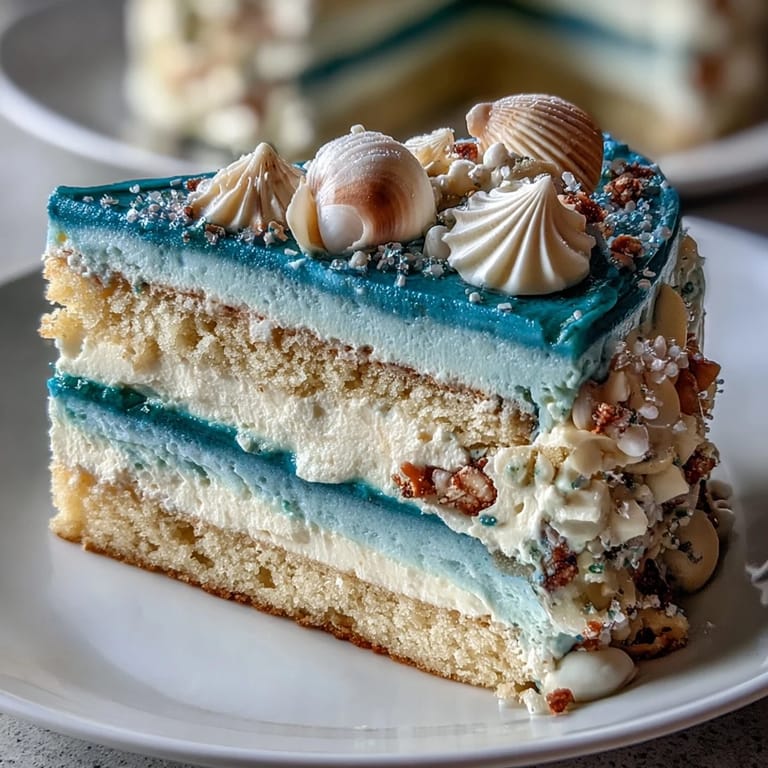
Pin My friend Sarah mentioned her birthday was coming up, and when I asked what she wanted, she said something about being a Pisces and loving the ocean. That got me thinking about water, waves, and the kind of blue you see at twilight when the sky meets the sea. I ended up sketching a cake in my head that same evening—layers of vanilla sponge with frosting that shifted from pale sky blue to deep ocean, like watching the water change as you wade deeper. It took a few tries to get the ombre right, but the moment I saw it all come together, I knew I'd created something special.
I made this cake for Sarah's party on a Saturday afternoon, and her whole family gasped when I set it down. Her mom asked if I'd bought it from a bakery, and I actually felt a little proud standing in that kitchen. What surprised me most was how the cake became the centerpiece of conversation—people slowed down, took photos, and genuinely seemed to taste it more carefully because it was so beautiful. That's when I realized a cake like this does more than fill stomachs; it creates a moment.
Ingredients
- All-purpose flour (2 ½ cups): Sifting it with the baking powder and salt prevents lumps and helps the cake rise evenly, giving you that tender crumb that melts on your tongue.
- Baking powder (2 ½ tsp): This is your lift, so don't skip it or reduce it—it's what makes the cake light instead of dense.
- Unsalted butter (¾ cup for cake, 1 ½ cups for frosting): Room temperature butter incorporates air when creamed, and using unsalted lets you control the salt level throughout.
- Granulated sugar (1 ¾ cups): It's not just sweetness; it helps create that fluffy texture when beaten with butter, plus it keeps the cake moist as it sits.
- Eggs (4 large): Room temperature eggs emulsify better and create a smoother batter, so pull them out of the fridge 30 minutes before you start.
- Pure vanilla extract (1 tbsp for cake, 2 tsp for frosting): The real stuff matters here—the fake stuff tastes metallic against buttercream, and you'll taste the difference.
- Whole milk (1 cup for cake, ¼ cup for frosting): Room temperature milk blends seamlessly into the batter and frosting without shocking the temperature.
- Powdered sugar (6 cups): Sifting it removes lumps and makes the frosting silky smooth, which is essential when you're creating that ombre gradient.
- Blue gel food coloring: Gel colors are concentrated and won't water down your frosting like liquid ones do, and you can create shades from whisper-pale to ocean-deep.
Tired of Takeout? 🥡
Get 10 meals you can make faster than delivery arrives. Seriously.
One email. No spam. Unsubscribe anytime.
Instructions
- Set Your Stage:
- Preheat your oven to 350°F and grease three 8-inch pans, lining them with parchment paper so the cakes slide out perfectly. Having everything ready before you start mixing is the difference between a smooth process and scrambling at the last second.
- Combine the Dry Ingredients:
- Sift flour, baking powder, and salt together into a medium bowl—this aerates the flour and distributes the leavening evenly. Set it aside and take a moment to enjoy how light and fluffy it looks.
- Cream Butter and Sugar:
- Beat softened butter and sugar in a large bowl for 3 to 4 minutes until it's pale, fluffy, and almost cloud-like. You'll hear the mixer whirring, and the mixture should look like frosting before you add anything else.
- Incorporate the Eggs:
- Add Vanilla:
- Beat in eggs one at a time, waiting for each to fully incorporate before adding the next, then add vanilla extract. This creates an emulsified batter that bakes up tender.
- Alternate Wet and Dry:
- Add the flour mixture in three additions, alternating with milk, and start and end with flour—this keeps the batter from getting too wet or too dry. Mix only until just combined; overmixing develops gluten and makes the cake tough.
- Divide and Bake:
- Divide batter evenly among the three pans and smooth the tops with a spatula. Bake for 25 to 30 minutes until a toothpick comes out clean and the edges are just beginning to pull away from the sides.
- Cool with Patience:
- Let cakes cool in the pans for 10 minutes—they'll be fragile at first—then turn them out onto a wire rack to cool completely. This step takes time, but rushing it causes crumbling.
- Make the Frosting Base:
- Beat softened butter until creamy, then gradually add sifted powdered sugar, mixing well after each addition. The gradual approach prevents clouds of sugar from flying everywhere and ensures smooth frosting.
- Season the Frosting:
- Add vanilla and a pinch of salt, then beat in milk a little at a time until the frosting reaches a smooth, spreadable consistency. It should hold a peak but spread easily without resistance.
- Create Your Color Gradient:
- Divide the frosting into four bowls and tint each with blue gel coloring, from pale sky blue to deep ocean blue. The gel colors are concentrated, so start with just a toothpick dab and add more gradually—you can't un-color frosting.
- Layer and Frost:
- Place the first cake layer on your serving plate, spread with the lightest blue frosting, repeat with the remaining layers, then chill briefly. This helps the frosting set so the layers don't slip when you frost the outside.
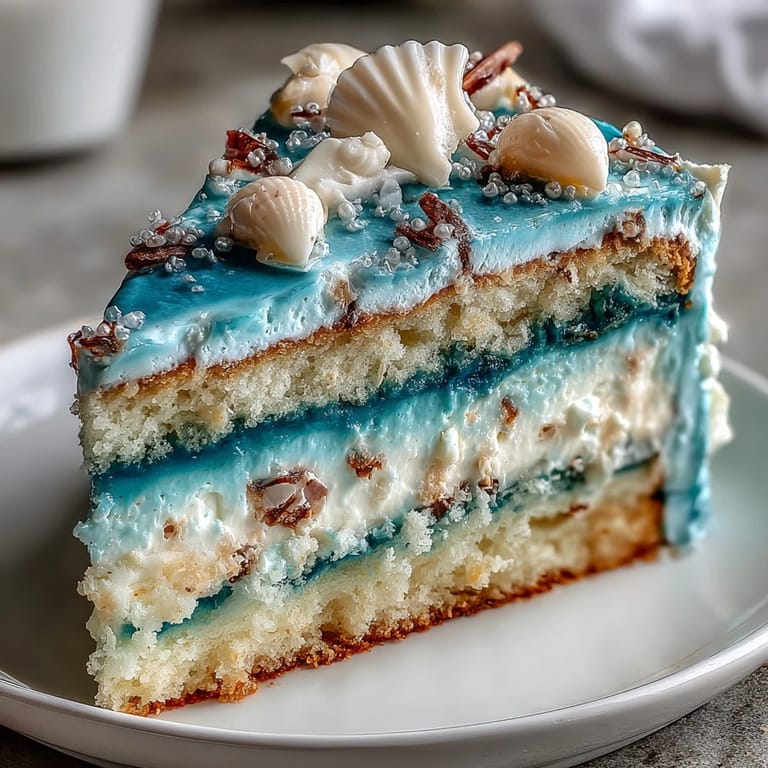
- Create the Ombre Effect:
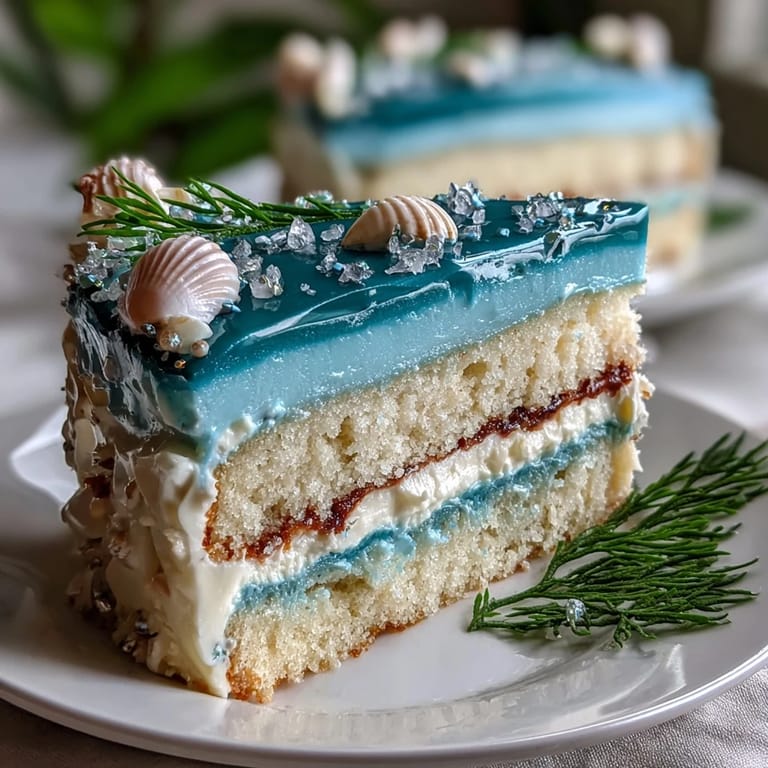
- Starting at the top with the lightest blue and working down to the deepest shade at the base, frost the sides and top with an offset spatula, blending where the colors meet. Step back and look at it from different angles—you're creating an ocean view on cake.
- Add the Magic:
- Decorate with white chocolate seashells, edible glitter, and blue and silver sprinkles if desired. These touches transform it from pretty to absolutely enchanting.
- Chill Before Slicing:
- Give the finished cake 30 minutes in the fridge to set the frosting and make slicing clean. A warm cake will crumble; a chilled one cuts like a dream.
 Pin
Pin The night before Sarah's party, I realized I'd made enough frosting to frost ten cakes, so I spent an hour perfecting the ombre, taking photos, adjusting shades. When the cake finally sat on the table at her party, watching people's faces light up felt like the whole effort had been worth it. That cake taught me that sometimes the recipes that challenge us a little bit are the ones that create the biggest impact.
The Secret to a Moist Vanilla Cake
I used to think vanilla cakes were boring until I learned that the alternating wet-dry method is the real secret to keeping them moist and tender. By adding flour, then milk, then flour again, you prevent the batter from becoming too dense or too thin, which is why this cake stays soft for days. The first time I made it, I couldn't believe how much more flavorful and moist it was than my old method of mixing everything together at once.
Working with Food Coloring Like a Pro
The ombre effect scared me at first because I thought blending colors would turn everything muddy, but the trick is to use an offset spatula with a light hand and let the colors overlap naturally without over-mixing. Gel coloring is worth every penny because it stays vibrant and doesn't water down your frosting like liquid coloring does. I keep a damp paper towel nearby while frosting to clean my spatula between color applications, which keeps the gradients crisp and prevents one shade from completely dominating the next.
Decorating and Presentation Ideas
The white chocolate seashells and edible glitter aren't just pretty—they tie the whole ocean theme together and make the cake feel like an experience rather than just dessert. I've found that placing decorations while the frosting is still slightly cool keeps them from sliding around, and spacing them out evenly makes the cake feel intentional and polished. You can make this as simple or elaborate as you want; even just a dusting of edible shimmer over the ombre makes it look professional.
- Make white chocolate seashells ahead of time by piping melted white chocolate onto parchment paper and chilling until hard.
- Add edible glitter sparingly—it's potent, and a little goes a long way toward making the cake sparkle.
- Consider pairing the cake with a sparkling Moscato or light herbal tea to echo the ocean theme in your celebration.
 Pin
Pin Baking this cake taught me that sometimes the most magical creations come from taking time with the details—the room temperature ingredients, the careful gradient, the thoughtful decorations. Every element works together to create something that looks like ocean magic on a plate.
Recipe Q&A
- → How is the ombre blue frosting achieved?
The frosting is divided into four portions, each tinted with varying intensities of blue gel food coloring. Starting with the lightest shade on top, layers descend in deeper blues to create a smooth ocean gradient effect.
- → What makes the cake moist and tender?
Using room temperature butter, eggs, and milk ensures even mixing. The batter alternates dry ingredients with milk to maintain a tender crumb, while optional simple syrup brushing enhances moisture after baking.
- → Can the cake be prepared ahead of time?
Yes, the cake layers can be baked and cooled in advance. Assemble and frost the layers shortly before serving, then chill for at least 30 minutes to set the frosting properly.
- → What decorations complement the blue ombre frosting?
Edible white chocolate seashells, shimmering glitter, and blue or silver sprinkles create an elegant ocean-inspired look that enhances the gradient frosting.
- → Are there tips for consistent color shading in frosting?
Start with small amounts of gel coloring and gradually increase to desired depths. Mix each portion thoroughly for even color, avoiding watery textures by using gel rather than liquid dyes.